How to Clean Dog Ears at Home: Step-by-Step Guide
April 7, 2026 · 7 min read
Ear cleaning is one of the most overlooked parts of routine dog care, and also one of the most important. A dog's ear canal is shaped like an "L" — it drops vertically and then makes a sharp horizontal turn toward the eardrum. That shape is great for protecting the eardrum from debris, but it also creates a warm, dark, moist pocket where bacteria and yeast thrive. When wax, moisture, and allergens accumulate in that pocket, infections follow. And ear infections in dogs are not just uncomfortable — they are painful, recurring, and expensive to treat once they become chronic.
I have cleaned thousands of dog ears over the years, from Poodle puppies to senior Basset Hounds with ears that practically drag on the ground. The good news is that ear cleaning at home is simple, takes about two minutes once you know what you are doing, and can prevent the vast majority of ear infections before they start.
Why Ear Cleaning Matters
A healthy ear canal has a self-cleaning mechanism similar to a conveyor belt — epithelial cells migrate outward from the eardrum, carrying wax and debris with them. In dogs with upright ears and no underlying allergies, this system works well enough on its own. But in dogs with floppy ears, narrow ear canals, excessive hair growth in the canal, or allergies, the system gets overwhelmed. Moisture gets trapped, wax builds up, and the canal becomes a breeding ground for infection.
Chronic ear infections cause permanent damage. The ear canal thickens and narrows with each infection, making future infections more likely and harder to treat. In severe cases, the canal can become completely calcified, requiring surgical removal. Regular cleaning breaks this cycle by removing the buildup before it becomes a problem.
How Often Should You Clean?
There is no universal schedule because ear cleaning frequency depends entirely on your dog's anatomy, breed, and lifestyle:
- Floppy-eared breeds — Beagles, Basset Hounds, Cocker Spaniels, and Golden Retrievers — need cleaning every one to two weeks. Their heavy ear flaps seal the canal and trap moisture, creating a perfect environment for yeast and bacteria.
- Upright-eared breeds — German Shepherds, Chihuahuas, and Corgis — usually need cleaning every two to four weeks. Their open ear canals get better air circulation, which naturally reduces moisture buildup.
- After every swim or bath: Water in the ear canal is the single biggest trigger for ear infections. If your dog swims regularly, clean and dry the ears every single time. This is non-negotiable for water-loving breeds like Labs and Spaniels.
- Dogs with allergies: Clean weekly regardless of ear type. Environmental allergies cause inflammation in the ear canal that increases wax production and creates favorable conditions for infection.
What You Will Need
- A quality ear cleaning solution — Zymox Ear Cleanser is our top recommendation. It contains a patented enzymatic formula with lactoferrin, lysozyme, and lactoperoxidase that gently breaks down wax and debris while inhibiting bacterial and yeast growth. It is gentle enough for weekly use and does not sting irritated skin, which makes it ideal for dogs that already have sensitive or mildly inflamed ears.
- Cotton balls or gauze pads (never cotton swabs)
- Treats for rewarding cooperation
- A towel (your dog will shake)
Step-by-Step Ear Cleaning Guide
Step 1: Inspect the Ear
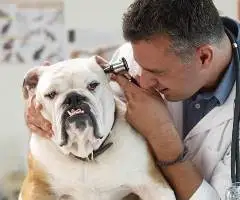
Before cleaning, flip the ear flap over and take a good look. A healthy ear is pale pink, has minimal odor, and has a thin layer of light-colored wax. If you see redness, swelling, dark brown or black discharge, a foul smell, or your dog yelps when you touch the ear, stop — these are signs of infection, and cleaning an infected ear without veterinary guidance can push debris deeper and rupture the eardrum. See your vet first.
Step 2: Apply the Cleanser
Hold the ear flap up and gently squeeze enough ear cleaning solution into the ear canal to fill it. You want the canal fully flooded — most people use far too little. The solution needs to reach down into the horizontal portion of the canal where debris accumulates. Do not let the bottle tip touch the ear, as this can transfer bacteria between ears or between dogs.
Step 3: Massage the Base
With the ear flap still held up, use your other hand to massage the base of the ear for 20 to 30 seconds. You should hear a squishing sound — that means the solution is moving through the canal and loosening debris. Most dogs actually enjoy this part once they get used to it. The base of the ear is located where the ear meets the skull, and you will feel the cartilage of the ear canal beneath your fingers as you massage.
Step 4: Let Your Dog Shake
Step back (or hold the towel up as a shield) and let your dog shake their head. This is the most effective part of the cleaning process. The vigorous shaking drives loosened debris and excess solution out of the deep canal. It will be messy, which is why I always recommend doing ear cleaning in the bathroom, kitchen, or outside.
Step 5: Wipe Clean
Use a cotton ball or gauze pad wrapped around your finger to gently wipe the visible portion of the ear canal and the inner ear flap. Remove any debris and excess solution you can see and reach. Go only as deep as your finger naturally reaches — never force anything deeper into the canal. If the cotton ball comes out very dirty, repeat the entire process one more time. If it comes out relatively clean, you are done.
Step 6: Reward
Give your dog a high-value treat immediately after each ear is cleaned. Ear cleaning should always end on a positive note, especially while you are building the habit. Dogs that associate ear cleaning with treats become cooperative patients instead of wrestling matches.
Signs of Ear Infection
Even with regular cleaning, ear infections can still develop — especially in allergy-prone dogs. Watch for these warning signs:
- Odor: A yeasty, sweet, or foul smell coming from the ear is the earliest and most reliable sign. Healthy ears have almost no odor.
- Discharge: Brown, yellow, or bloody discharge is abnormal. Dark brown, waxy discharge often indicates yeast. Yellow or green discharge suggests bacteria.
- Head shaking or tilting: Occasional head shaking is normal after swimming or waking up. Persistent, vigorous shaking or tilting the head to one side signals discomfort in the ear canal.
- Scratching at the ear: Pawing at the ear, rubbing the ear against furniture or the floor, or whimpering when the ear is touched all indicate pain.
- Swelling or redness: The inner ear flap and visible canal opening should be pale pink. Redness, swelling, or warmth indicate inflammation.
If you notice any of these signs, schedule a vet visit. Ear infections do not resolve on their own, and they get worse — and more expensive to treat — the longer you wait.
Breeds That Need the Most Ear Care
While any dog can develop ear problems, certain breeds are disproportionately affected due to their anatomy:
- Cocker Spaniels: Heavy, pendulous ears combined with abundant hair growth inside the canal make them the poster breed for chronic ear infections.
- Basset Hounds: The longest ears in the dog world trap moisture and drag through food, water, and dirt all day long.
- Beagles: Floppy ears and an active, outdoor lifestyle create constant exposure to moisture and debris.
- Labrador Retrievers: Their love of water means constantly wet ear canals, and they are also prone to environmental allergies that compound the problem.
- Poodles and Doodle mixes: Hair grows inside the ear canal and must be plucked or trimmed regularly to allow adequate air circulation.
- Shar-Peis: Narrow, stenotic ear canals make cleaning difficult and infections almost inevitable without diligent maintenance.
What Never to Use
Certain products and techniques can cause serious harm:
- Cotton swabs (Q-tips): They push debris deeper into the canal and can rupture the eardrum if inserted too far. Use cotton balls or gauze only.
- Hydrogen peroxide: It causes irritation and fizzing that can damage the delicate skin lining the ear canal, and the moisture it leaves behind promotes bacterial growth.
- Rubbing alcohol: Extremely painful on irritated or broken skin and overly drying to the ear canal.
- Vinegar solutions: While mildly acidic environments discourage yeast, vinegar stings inflamed skin badly and is not reliably effective compared to formulated ear cleaners.
- Water: Plain water does not dissolve wax, does not evaporate quickly from the ear canal, and adds the very moisture you are trying to remove.
Final Thoughts
Ear cleaning is a two-minute task that can save you hundreds of dollars in veterinary bills and — more importantly — spare your dog the pain of chronic ear infections. The key is consistency: clean on a regular schedule, clean after every exposure to water, and inspect the ears every time you groom. Catching a problem early, when there is just a little extra wax or a faint smell, is infinitely better than dealing with a full-blown infection that requires weeks of medicated drops and vet rechecks.
For a complete rundown on at-home grooming routines including brushing, nail trimming, and dental care, see our best dog grooming tools guide.
As an Amazon Associate, BabyMyDog earns from qualifying purchases. Prices are approximate and may change. This does not influence our recommendations.